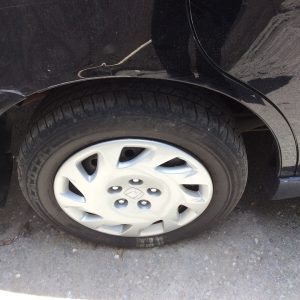
Changing a flat tyre can be very difficult if you don’t know what you are doing. Follow our tyre replacement guide.
Safety tips:
- Ensure the vehicle is off with the parking brake engaged.
- Ensure that no one is in the car during the tyre changing process.
- Always be seen. Use your hazard lights.
1. Find an ideal location.
If your tyre goes flat while you’re driving, scan your surroundings for a safe place to stop. Do not stop on the side of narrow, busy road. Instead, look for level ground with lots of space.
Turn your hazard lights on to alert other drivers. Once you are stopped, turn the vehicle off and apply the parking brake.
2. Gather your equipment.
Ideally, you should have the following in your car:
Necessary for changing a tyre:
- A spare tyre.
- A jack.
- A wrench.
Helpful:
- The vehicle’s manual.
- A torch. (for changing the tyre at night)
- A small piece of wood. (to secure the jack)
- A rain jacket.
- Gloves.
If you do not have the required items in your car, you will need to contact someone who does. Therefore it important to always keep these items handy.
3. Remove the hubcap.

Most vehicles have hubcaps or wheel covers protecting the wheel nuts. If yours doesn’t, feel free to skip this step.
Use the flat end of your wrench to remove the hubcap from the tyre, exposing the nuts. If this doesn’t work, your vehicle may require a different tool. In this case, consult your vehicle’s manual for information.
4. Loosen the wheel nuts.
Use the wrench to loosen the nuts on the tyre. Turn the nuts counter-clockwise until they become loose. This may require pressure depending on how tightly they are screwed on. Do not completely remove the nuts yet.
5. Use the jack to raise the vehicle.

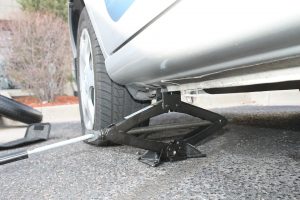
Identify your vehicle’s jacking point. This is a metal area underneath your vehicle where the jack should be positioned. Consult your car’s manual for vehicle-specific jacking instructions.
If you have a piece of wood handy, place it under the jack to prevent it from coming off balance.
Place the jack in its correct position and raise the vehicle until the flat tyre is about 15cm above the ground.
6. Remove the flat tyre.
Now that your vehicle is lifted, it is now safe to remove the tyre. Remove the already loosened nuts from the wheel and store them somewhere you will not lose them.
Grab the flat tyre with two hands and gently pull it away from the vehicle until it is completely removed. Place the tyre on its side so that it doesn’t roll away.
7. Mount the spare tyre.
Position the spare tyre on the hub where the previous tyre sat. Fasten the nuts by turning them clockwise with your hand. This will keep the wheel secure in place as you lower it.
8. Lower the vehicle.
Use the jack to lower the vehicle. Before the vehicle is completely lowered, tighten the nuts using your wrench until they will not turn any further.
You can now safely lower the vehicle completely. Once this process is complete, remove the jack from underneath the vehicle.
9. Replace the hubcap.
If applicable to the new tyre, reposition the hubcap or wheel cover so that it covers the wheel nuts. Your new tyre is now ready to be used.
Additional tips:
- Spare tyres deflate over time, even when they are not in use. Be sure to keep an eye on your spare tyre’s pressure.
- Repair or replace your flat tyre as soon as possible. This way, you can have a spare tyre handy if this happens again.
- Reduce the likelihood of another flat tyre. Follow our guide on extending the life of your tyres.

